How chemigrams are produced:
You can do these in a normal room where light enters or in the dark room where the photographic paper isn't exposed to light. First of all you take photographic paper out of the bag where it is exposed to light. You then place your liquid/substance on the paper and take it to the window where even more light can get to it. After this you can place the photo in the developer and the chemicals from your substance will start to make a pattern on the paper. There is no set time for how long you leave it in the developer. You then take it out and place it in the stop for as long as you like. Finally you put it in the fix however, this step does not always need to be taken and if you do not place your chemigram in the fix then it tends to change colour. This process is exactly the same in the dark room however, you do it in the dark and just expose it to light for a short amount of time (something like 5 seconds).
You can do these in a normal room where light enters or in the dark room where the photographic paper isn't exposed to light. First of all you take photographic paper out of the bag where it is exposed to light. You then place your liquid/substance on the paper and take it to the window where even more light can get to it. After this you can place the photo in the developer and the chemicals from your substance will start to make a pattern on the paper. There is no set time for how long you leave it in the developer. You then take it out and place it in the stop for as long as you like. Finally you put it in the fix however, this step does not always need to be taken and if you do not place your chemigram in the fix then it tends to change colour. This process is exactly the same in the dark room however, you do it in the dark and just expose it to light for a short amount of time (something like 5 seconds).

My Chemigrams:
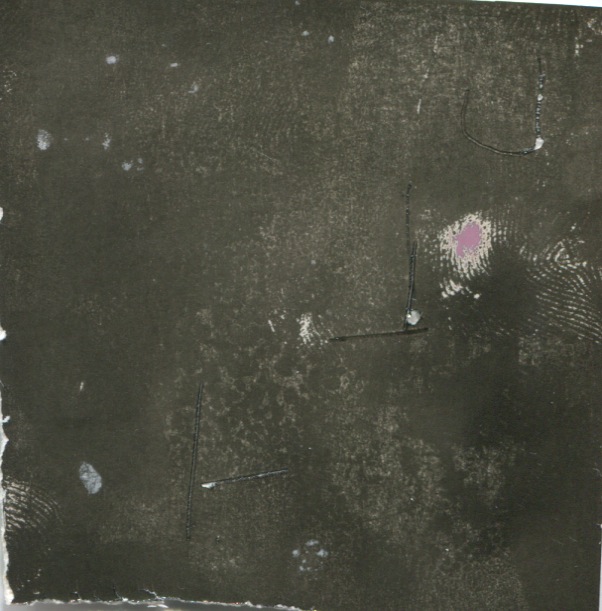
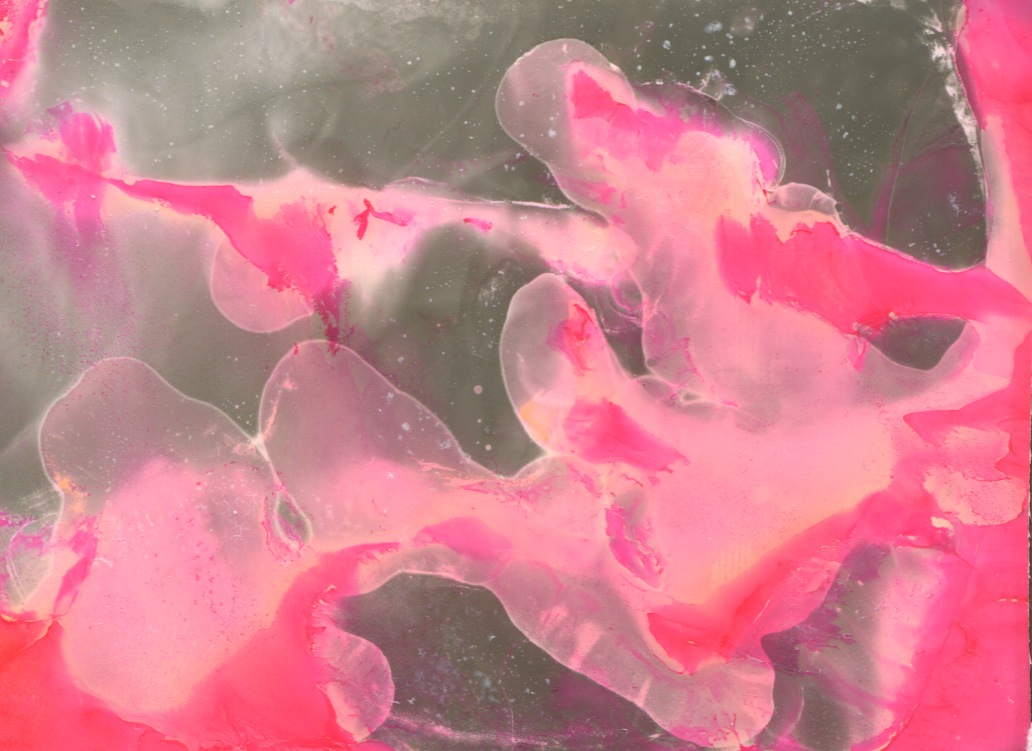
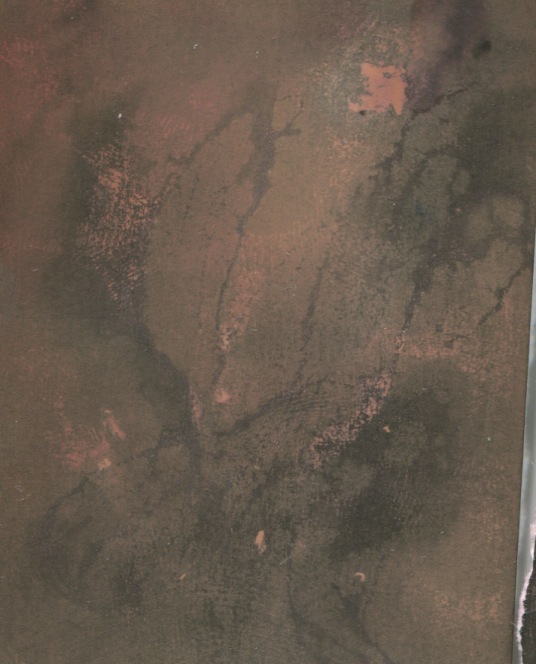
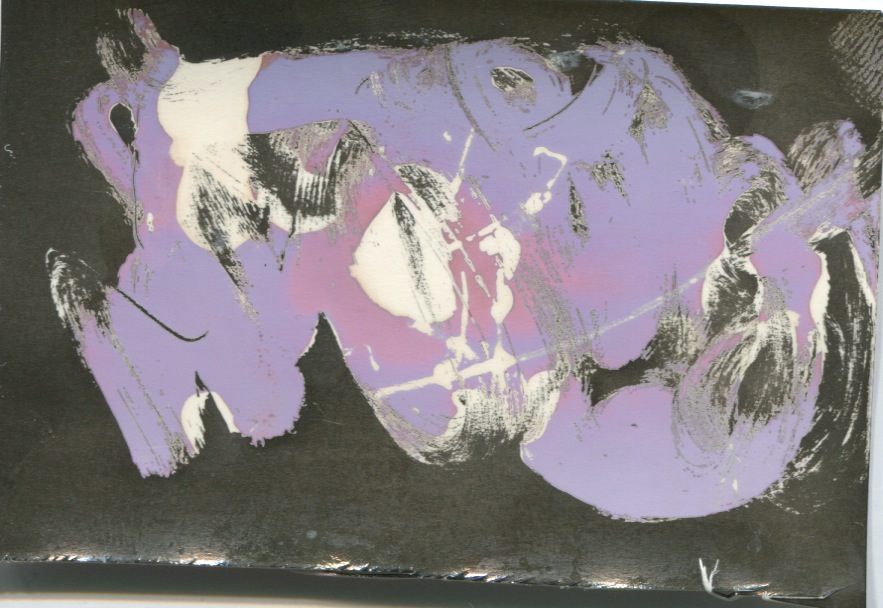
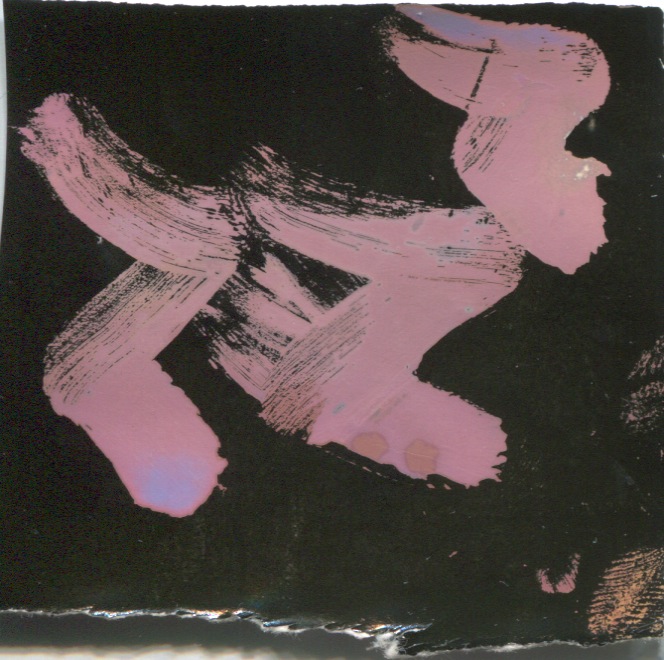
For my first chemigram I used lip balm on my photographic paper and then walked over to the window where more of the photographic paper would become exposed to light. I then placed it in the developer for a short period of time. After that I placed it in the stop briefly then into the fix. This came out with white squiggles/ blob in the middle and was surrounded by black. After some time the white bit in my chemigram turned lilac with pink and white spots. I then repeated this process with the same substance (the lip balm) but just didn't place it in the fix. This meant that the chemigram just turned pink after I left it for a while showing that placing the photographic paper in the fix makes a big difference to the outcome of the chemigram. I did three more chemigrams in a normal room and these did not come out as good as my first two. I sprayed deodorant on the photographic paper and then exposed it to more light. I feel I left the chemigram in the developer and stop for too long as it came out mainly black with little white speckles on it and also one small dot of pink. This could of been improved by exposing it to light for longer as then the substance would show up more on the paper. For my second to last one I used spit and I believe this came out pretty well as the paper is more of a grey colour with loads of pink streaks running through it. The last chemigram I did was not very good although I though it would be the best because I used ink. However, this was not the case and the chemigram came out really dark with squiggly streaks of pink running through it. If I exposed it to light for longer I believe that the ink would of come out more and the chemigram would of been better I also think I should of taken it out of the stop sooner. I only managed to do two chemigrams in the dark room however, these were the ones I preferred. The first chemigram I did was again with the lip balm and I only placed it in the developer and stop. This came out good as after a while many colours appeared where I had applied the lip balm. There was light blue, lilac, white and pink. My last chemigram was my favourite chemigram as I used ink and spray which came out really well. The ink went from shades of light pink to dark pink and was spread across the photograohic paper nicely.
Pierre cordier
Cordier is known as the father of chemigrams and is a Belgian artist. He is considered the pioneer of the chemigram and he also helped in developing the chemigram as a means of artistic expression. Cordier discovered the chemigram on november 10th 1956 whilst writing to a young German women with nail varnish on photographic paper. The technique, which "combines the physics of painting (varnish,oil,wax) and the chemistry of photography (photosensitive emission, developer and fixer), without the use of a camera or enlarger, and in full light" became a source of experiment for him.
Cordier is known as the father of chemigrams and is a Belgian artist. He is considered the pioneer of the chemigram and he also helped in developing the chemigram as a means of artistic expression. Cordier discovered the chemigram on november 10th 1956 whilst writing to a young German women with nail varnish on photographic paper. The technique, which "combines the physics of painting (varnish,oil,wax) and the chemistry of photography (photosensitive emission, developer and fixer), without the use of a camera or enlarger, and in full light" became a source of experiment for him.
|
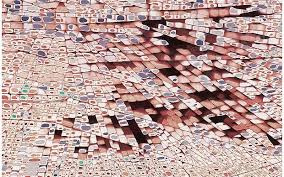
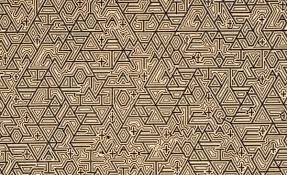
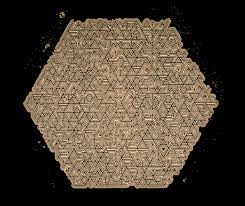
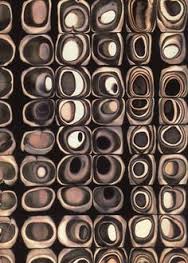
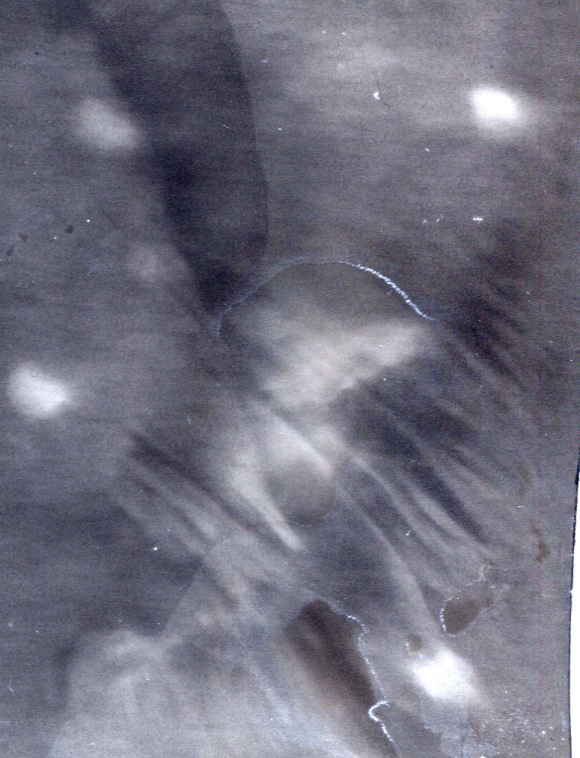
In Cordier's chemigrams he has clearly used materials in certain patterns to create repetitive shapes. He has learned to do this through experimenting with different materials and applying them in different ways. Through practising Cordier has got better and better at applying materials so that intriguing shapes and patterns are formed on the photographic paper. This chemigram is very eye capturing because it makes people question how Cordier has created such a specific pattern on the paper. The lines in this chemigram are very strong and distinctive but go in all directions and so direct your eyes all over the chemigram not just to the middle. The different shades are a really good example of the correct aperture as there is nothing bleached out which shows he has got the light intensity and timing correct.
|
Chemigrams inspired by Pierre Cordier
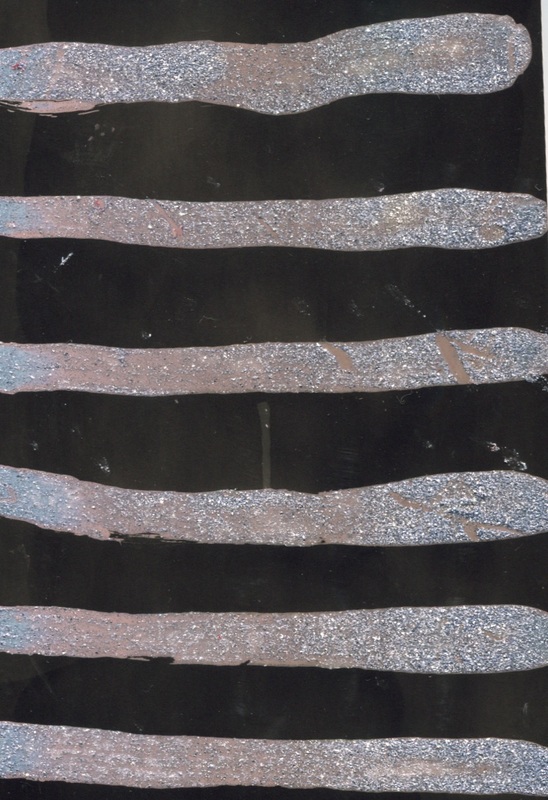
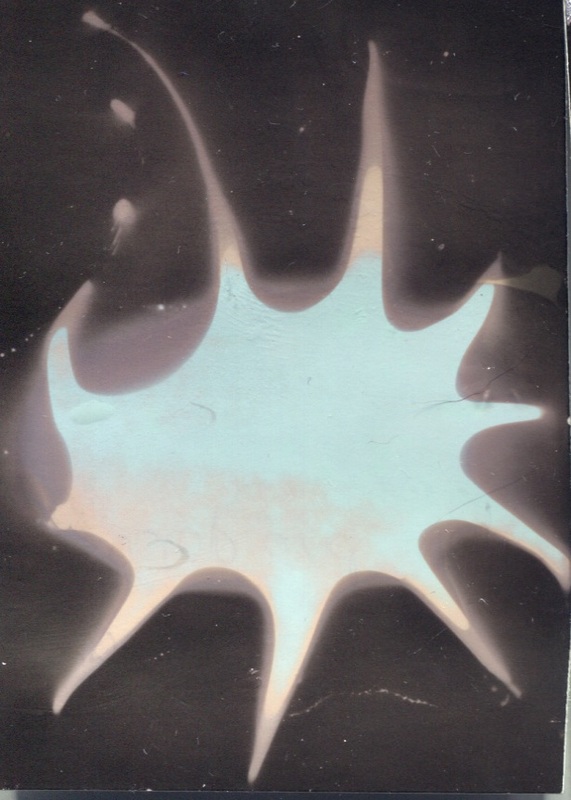
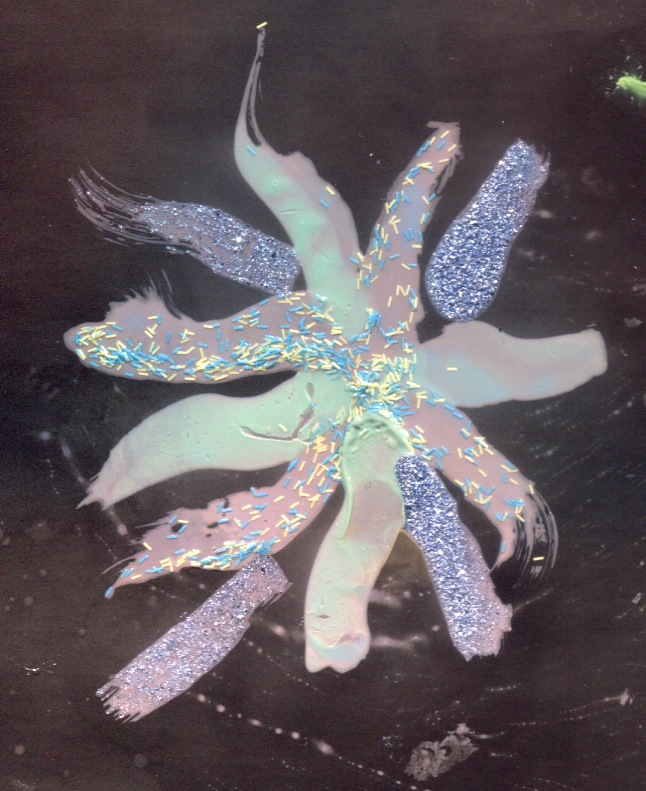
For these chemigrams I used different materials and applied them with different objects e.g ear buds, tooth pick and nail varnish brush. For my first chemigram I used nail varnish and applied it with with the nail varnish brush in strips. The nail varnish was originally blue and sparkly but after it had been taken out of the developer and stop and then left for a while it had hints of purply-pink. For my second chemigram I used honey and spread it with a tooth pic. This came out originally white but after being left in the light turned blue with bits of pink and white. The third chemigram I produced was with nail varnish remover and I liked the way it came out because it reminded me of the night sky. I used a ear bud to apply this as then none spilt and it made it easier to apply the substance to the whole of the photographic paper. For my last chemigram I used a variety of nail varnished in a star like shape. This turned out pretty much like my first chemigram but was just produced in a different shape. These chemigrams were inspired by Pierre Cordier as in his work his chemigrams were always in a specific pattern and this is what I tried to achieve by applying my substances with different materials. I also used similar substances to Cordier as I wanted to achieve a similar affect to him however, I believe that I needed to practice a few more times to create a more intriguing patterns like Cordier did. I also tried to created repetitive images as that is what Cordier does but mine look way different as Cordier's patterns seem to mainly cover most of the photographic paper where as, mine are quite central and have a lot of black photographic paper in the background.
