Photograms
Process to producing photogrames: First of all you start by placing the photographic paper shiny side up; you then put the enlarger onto the settings you want for example, aperture of 2.8 and light for 2 seconds. You then place your objects on the white paper and expose it to the light. Once you have done this you place your paper in the developer for 2 minutes, then in the fix for 1 minute and finally in the stop for another 2 minutes. After that you rinse your photogram off and hang it up until it is dry. You would of now finished your first photogram.
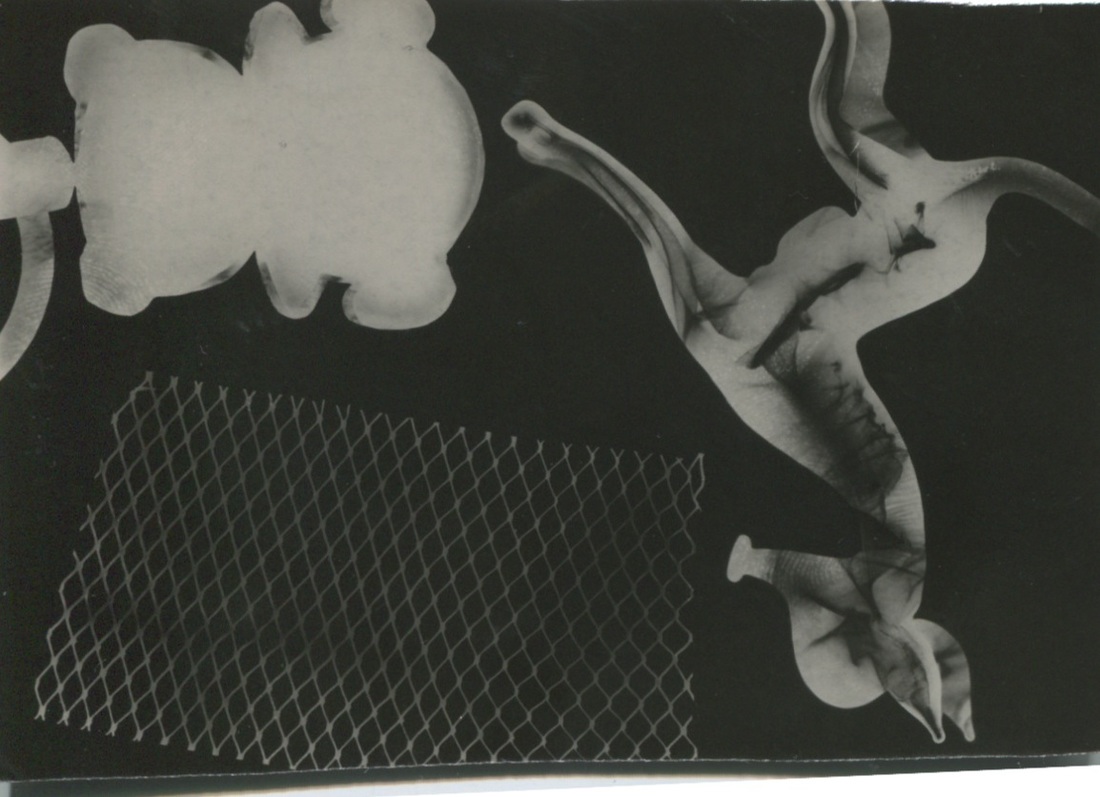
The first photogram I produced I used three different objects: a glass ornament, a metal teddy bear key ring and mesh. I had the aperture at 2.8 and exposed it to the light for 1 second. After that I put my photo in the developer then the stop and finally in the fix so my photo was produced onto the photographic paper. This gave a good photogram as the there was a lot of detail from the ornament however, the keyring with over exposed and a little bit bleached out. This meant for my next photogram I needed a lower light intensity and had to expose it for a longer time. For my next photogram I put the the aperture at 4 and exposed it to the light for 2 seconds. This didn't seem to make too much difference to the detail on the teddy bear. I also added a metal pin to the photogram which was also bleached out. This shows that metal is not a very good object to use under the enlarger as it gets overexposed very easily. For my third photogram I used a larger photographic paper with a aperture 4 and exposed it to the light for 3 seconds. I used more objects in this one as there was a larger amount of paper to cover. In the photogram I used: a glass perfume bottle, a metal keyring, a plastic cup, newspaper, glass ornament, a piece of plant, a negative, mesh and a letter on transparent plastic. This photogram came out with a variety of blacks to whites but mainly the photogram was dark but had quite a lot of detail on my objects. The detail on my objects created a really nice photogram as there were different shades on each shape meaning the different objects looked better. This means that next time if I was to do another photogram I would probably put the light intensity higher (so have a aperture of 2.8) which would expose the objects more while still keeping detail on the objects.
The first photogram I produced I used three different objects: a glass ornament, a metal teddy bear key ring and mesh. I had the aperture at 2.8 and exposed it to the light for 1 second. After that I put my photo in the developer then the stop and finally in the fix so my photo was produced onto the photographic paper. This gave a good photogram as the there was a lot of detail from the ornament however, the keyring with over exposed and a little bit bleached out. This meant for my next photogram I needed a lower light intensity and had to expose it for a longer time. For my next photogram I put the the aperture at 4 and exposed it to the light for 2 seconds. This didn't seem to make too much difference to the detail on the teddy bear. I also added a metal pin to the photogram which was also bleached out. This shows that metal is not a very good object to use under the enlarger as it gets overexposed very easily. For my third photogram I used a larger photographic paper with a aperture 4 and exposed it to the light for 3 seconds. I used more objects in this one as there was a larger amount of paper to cover. In the photogram I used: a glass perfume bottle, a metal keyring, a plastic cup, newspaper, glass ornament, a piece of plant, a negative, mesh and a letter on transparent plastic. This photogram came out with a variety of blacks to whites but mainly the photogram was dark but had quite a lot of detail on my objects. The detail on my objects created a really nice photogram as there were different shades on each shape meaning the different objects looked better. This means that next time if I was to do another photogram I would probably put the light intensity higher (so have a aperture of 2.8) which would expose the objects more while still keeping detail on the objects.

What are photograms and the history of them
Photograms are pictures made with photographic materials such as, light sensitive paper but without the use of a camera. William Henry Fox Talbot produced some of the first photographic pictures and he done this by placing leaves and pieces of material onto sensitized paper, then left them outdoors on a sunny day to expose. He was inspired by Thomas Wedgewood who had managed to make photograms which faded. Talbot therefore, started to mess around with the exposure of light onto the paper and realised images only stayed if they were exposed for a very long time. He then figure out that a short exposure still left a image on the paper however, you could not see this image very well. This led to him producing chemicals in which you could develop the images and we still use his developer, stop and fix to this day (our chemicals are just more advanced).
Photograms are pictures made with photographic materials such as, light sensitive paper but without the use of a camera. William Henry Fox Talbot produced some of the first photographic pictures and he done this by placing leaves and pieces of material onto sensitized paper, then left them outdoors on a sunny day to expose. He was inspired by Thomas Wedgewood who had managed to make photograms which faded. Talbot therefore, started to mess around with the exposure of light onto the paper and realised images only stayed if they were exposed for a very long time. He then figure out that a short exposure still left a image on the paper however, you could not see this image very well. This led to him producing chemicals in which you could develop the images and we still use his developer, stop and fix to this day (our chemicals are just more advanced).
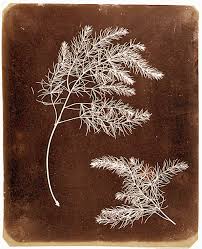
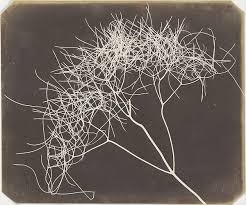
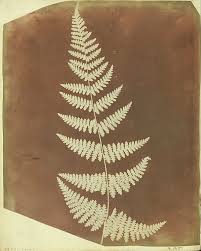
Talbot's photograms:

|
Talbots Photograms came out very well as there is a lot of detail on the plant showing that the exposer and timing were done very efficiently. Talbot did not have a lot of equipment and therefore, could not adjust the light intensity to not make the colour as bleached out and consist of more tones.
|
